
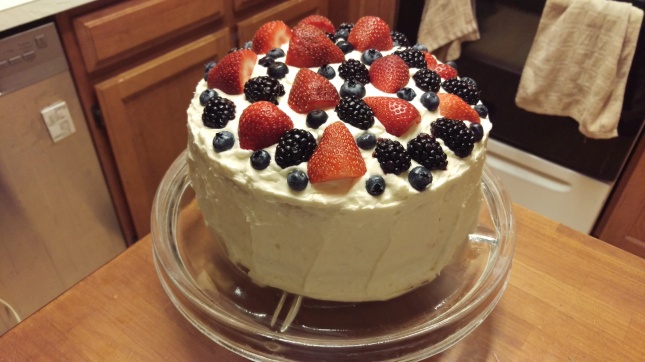
I can’t believe this came out of my kitchen… YESSSS!!!!
Happy New Year!!
My friends… oh my friends. It’s been a little bit since I posted last and during that time I’ve been trying and failing (sprinkled with succeeding) in my kitchen. I’ve experimented with gluten free crackers (still working on it) which came out like thin little pie crusts – fail. I experimented with strawberry cake and watched as I completely didn’t account for the pectin in the fruit puree and ended up with a gel cake – epic fail. I made sandwich bread where I did every step right, watched it brown to a beautiful shade, then had the center gummy because I’d added just a shade too much xanthan gum – *sigh* fail. I made danishes – now those worked like gang busters and were delicious to boot, but only after the first one came out like a kid on a bike with training wheels – only slightly close. The first one was at least edible, the second… heaven. I had to recalibrate my oven after figuring out things were failing also because… 25 degrees of difference is a HUGE deal… oy.
I suppose all the failures were moments of teaching… there’s nothing in the world more defeating than to have to dump two cakes down a sink. It really does make you feel like giving up baking because you just sent about twenty bucks down the drain. But… with my two guys both celiac, and the successes that made their faces light up… well, I couldn’t give up. It’s all a learning process.
I decided to tackle this chantilly cake. A little background – my husband and I had this cake at our wedding (just celebrated 17 years!), back before he had his diagnosis of celiac disease. It’s one of those deserts he remembered loving, but hasn’t been able to have it in years. I think that’s probably one of the most terrible things for me, my son is one thing – he’s been celiac from birth and hasn’t ever had the opportunity to eat wheat-based products. He doesn’t miss it. My husband, on the other hand, does. I hate knowing he has these memories of great food that he can no longer eat. Imagine – your favorite cookie and never being able to eat it again. Constantly chasing that dragon as you plow through the sometimes bland and chalky world of gluten free sweets. I couldn’t give up.
I went on a search for a recipe that would work and finally found one on A Sue Chef (link at the bottom). Let me just start with this… I thought I understood how to substitute a regular recipe for a gluten free one. HA… ha ha ha ha ha ha *deep breath* AHAHAHA. To put it in a positive way – I’m still learning how to manage that one. Learning what a cake batter should look like, for example, and when there isn’t enough flour to help it even be a cake. Yeah, I subbed in 140g of flour per called cup and 1/4 tsp of xanthan and ended up with jello cakes. I watched my first two cakes slide down the sink, the disposall whirring with satisfaction as it pulverized them into goo. I then made the frosting and watched what happens when you whip cream too long… I had the best cottage cheese looking frosting ever… just… wasn’t what I was looking for. And no amount of microwave or extra cream could overcome it. I simply had to feed my sink again. I’m amazed it isn’t fat yet. Ha ha ha!
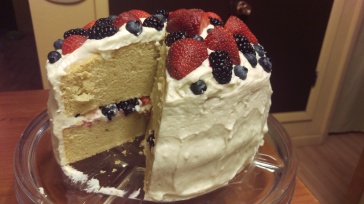
Two slices down, my heavy-handed nature bowed out the icing in the middle of the cake. Well, I suppose it only needs to look pretty before you nosh it to nothingness! 😀
So, I started again tonight. I decided that I was going to modify the cake recipe I’ve been using to make a vanilla/almond yellow cake. I decided I was going to make that frosting over again… and voila… after what feels like a deep slump in my baking prowess… I summitted cake Everest!! There it was… moist, delicious, and perfect – perfect – perfect!!
I would like to share the recipe below, along with some tips so you can avoid my mistakes my first go round. Trust me when I say, no one would guess it was gluten free. It’s insane how – when things come together – you can make magic in the kitchen. And yes… you can make magic, too. Don’t give up, even on those days where the best thing you did after four hours was make berry syrup. *grin*
A few notes:
- The cake itself is more of a pound cake. So it’s more dense than what you’d buy at Whole Foods, but it makes up for the density with powerful good flavor and incredible moistness. Feel free to sub in your own gluten free vanilla/yellow cake if you want a lighter version. (And feel free to share your recipe, I’d love to have more things that work!)
- I use dairy and eggs in my recipes. If you choose to substitute for those items, I can’t vouch for how well it will come out. I personally haven’t tried it myself, as I’m lacto- ovo- vegetarian. [And what would I tell my hens if I didn’t eat their wonderful products? I can already see Grace now, tilting her head with a skeptical gaze. Just like me, my girls want people to eat what they’ve made! That’s what I tell myself, anyway. Ha ha!]
- Again, my recipe is by weight. This is how I’ve learned to bake gluten free, and I urge everyone to do the same. Since flours can vary so much, the safest way to ensure you’re getting the same amount in your recipe, is by weight. I urge you to weigh your mixing bowl, so that when you divide up the recipe, you know exactly how much of the batter is half by simply subtracting your bowl weight and dividing it by two. Tare your cake pans and pour in half the batter and rest assured it’s precise!
- A Sue Chef’s gluten version of this recipe can be found here.
Gluten Free Berry Chantilly Cake
Cake (makes TWO 8″ round cakes):
- 8 oz GF flour (I use a mix of 20% millet, 20% sorghum, 30% super fine sweet white rice flour, 30% tapioca flour)
- 4 oz superfine sweet rice flour
- 2 oz tapioca starch
- 2 tsp baking powder
- 1 tsp salt
- 1/2 tsp xanthan gum
- 12 oz granulated sugar
- 4 tsp vanilla extract
- 2 tsp almond extract
- 8 large eggs
- 8 oz cream cheese
- 8 oz melted butter
Directions:
- Preheat oven to 350F and line your cake pans with parchment paper (you can buy round parchment precut to fit, I simply put the parchment over my pan and trimmed it to fit, leaving two tabs on either side that stick up above the pan. This will allow you to pull the cake up a little once it’s baked).
- In a large bowl, thoroughly combine the dry ingredients (except sugar). [Flour through xanthan gum.]
- Place the sugar, extracts, eggs, and cream cheese in a food processor. Pulse to combine. Slowly add in the butter to the mixture, pulsing as you go.
- Pour wet into another bowl and whisk the dry ingredients into the wet until smooth.
- Divide and pour mix into prepared pans and bake for 15 minutes.
- Reduce the oven temperature to 325F and bake for another 20 minutes. Turn the cake.
- Bake for another 20 minutes or until your tester comes out clean.
- Allow cakes to cool for 15 minutes before running a knife around the edge, and pulling the cakes out of the pans to transferring to a cooling rack.
- Allow cakes to cool **completely**.
Chantilly Frosting
Ingredients:
- 1 stick butter (room temperature)
- 16 oz mascarpone cheese (room temperature). [TIP: I made this with mascarpone the first time, and a quick substitute the second time… I literally could not tell the difference. So if you can’t find mascarpone or simply don’t want to spend the money to buy it – 16 oz cream cheese, 1/3 cup sour cream, 1/4 cup whipping cream. Boom. Mascarpone.]
- 8 oz cream cheese (room temperature)
- 2 1/2 cups confectioner’s sugar
- 1/8 tsp salt
- 1 cup heavy whipping cream (cold)
- 1 tsp almond extract
Directions:
- Cream your butter. [Just the butter. When I did this the first time, the directions I followed had you cream everything together… well, my butter ended up lumpy and that is why I threw everything out of whack. Cream it first, you’ll thank me.]
- Cream the butter with the cream cheese and mascarpone until light and fluffy.
- Add salt and extract and thoroughly blend.
- Add in the confectioner’s sugar a bit at a time, creaming it in while trying to avoid lumps.
- In a separate bowl, whip the heavy cream until stiff peaks form. [DON’T overmix!! Literally, you will go from stiff peaks to cottage cheese in what feels like seconds, so check your whip often. If it looks like cool whip, you’re good to go. If you overmix, slowly add in very cold heavy cream a tbsp at a time and hand STIR with a whisk until you’re back on track.]
- Gently fold the whipped cream into the mascarpone cream cheese mix until fully incorporated.
- Use immediately, or cover and refrigerate. If you are using it from the fridge, take it out 10 minutes prior to use to let it warm back to room temp.
Berry Syrup
You’ll be using this on any lower layers of cake to seal in moisture (and frankly, add in a little kick of berry flavor).
Ingredients:
- 1/2 cup water
- 1/4 cup sugar
- 1 cup sliced strawberries (or 2 tbsps of berry jam if you want super sweet).
Directions:
- In a small sauce pot, place all your ingredients.
- Cook over medium heat until the sugar has dissolved and your berries are looking translucent. (If you used jam, just reduce by half and let it cool. You are done!)
- Pour the mix through a strainer and smash down the strawberries. You should have a nice red liquid.
- Cook until it reduces by half and you have a nice syrup. Leave out to cool to room temperature, or refrigerate for later. (If you’re using it later, pull it out and let it come back to room temperature.)
Assembly!
- Using a bread knife, trim your bottom cake to be flat on the top (chop the top off!). [You may need to go around the edges as well to line them up, but it depends on how pretty you want your cake. I did not trim the edges nor did I take the top off of the top layer of cake. I left a dome on mine, which means the upper layer is thicker than the bottom. You can also slice your rounds in half to make four layers.]
- Spread a layer of berry syrup on the top of the first layer of cake.
- Spread a thin layer of icing on top of the berry syrup.
- Place as many sliced berries as you wish on the cake. I used blueberries, blackberries, and strawberries.
- Place the second layer of cake on top and repeat steps 2-3 until the last layer. You don’t want to put berry syrup on the top of the cake because it is difficult to spread!
- Frost the rest of your cake. [You can choose to cool the cake and ice on top of your first layer if you want a smoother look. I did not do this.]
- Garnish the top with fresh berries. I used blueberries, blackberries, and strawberries.
- [Optional Step] You can glaze the berries on top with a simple syrup or apricot glaze if you want them to shine!
- Refrigerate until serving and enjoy. Delicious!
